Create a new user in Cloud Exchange
Cloud Exchanged will be discontinued on 31/12/2020
In order to continue receiving e-mails sent to your domain name, transfer Cloud Exchange to Proximus Mail.
Want to create a new user in Cloud Exchange? You can only add new users if you are an administrator.
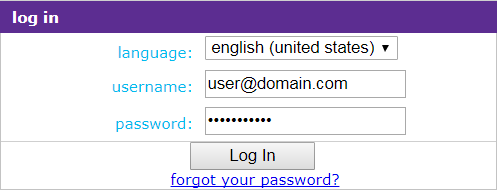
- Log in to Cloud Exchange with your administrator login and password.
- Click Add User.

- Fill in the fields as described below.
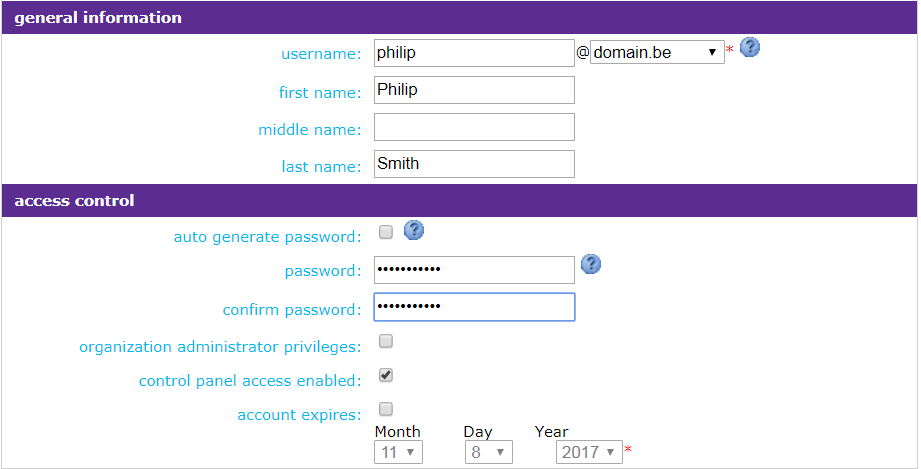
- Username: choose a username and select a domain name in the drop-down menu.
- First name: fill in a first name.
- Middle name: fill in a middle name (if applicable).
- Last name: fill in a last name.
- Auto generate password: checkmark this box if you want to generate a password automatically.
- Password: choose a password.
- Confirm password: fill in the chosen password again.
- Organization administrator privileges: checkmark this box if you want to appoint this user as an administrator.
- Control panel access enabled: checkmark this box.
- Account expires: checkmark this box if you want to set an expiry date for this user account.
- Click Next.
- At the top, checkmark the Hosted Exchange 2010 box.

- Checkmark the Hosted Exchange 2010 box again and press the
 button.

- Fill in the fields as described below.
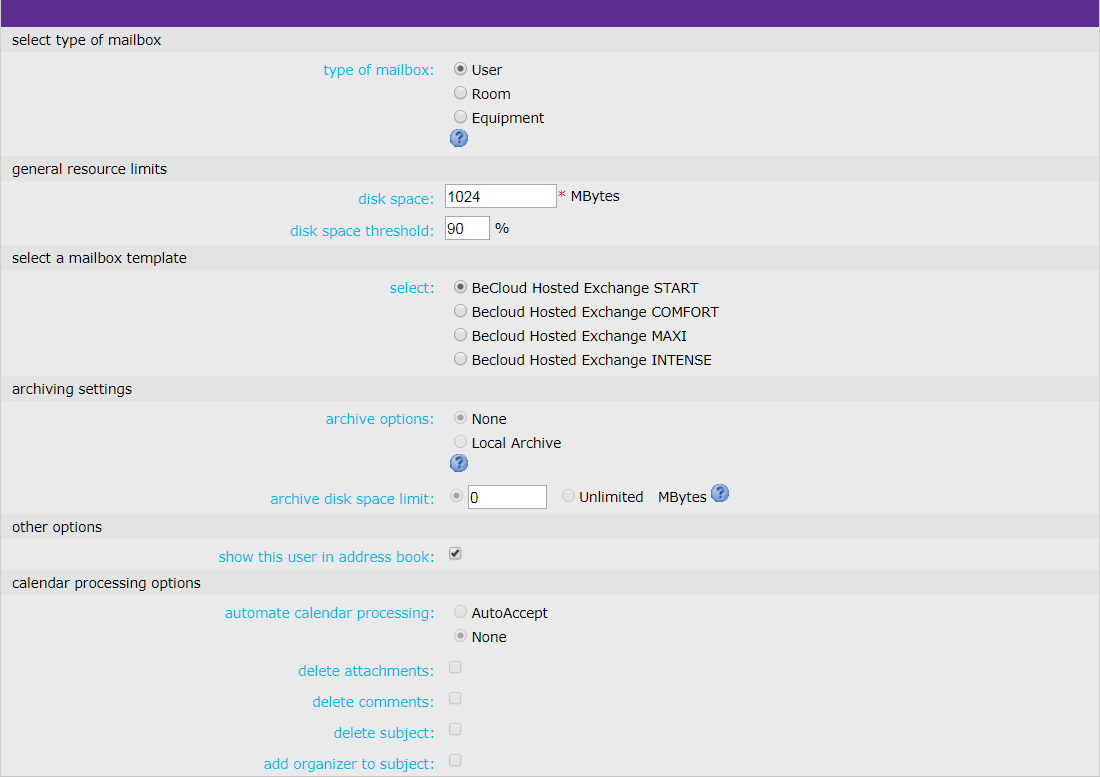
- Type of mailbox: choose a type of mailbox: user, room or equipment.
- Disk space: leave this field unchanged.
- Disk space threshold: leave this field unchanged.
- Select:choose the desired mailbox template:
- Cloud Exchange Start (= a POP3 or IMAP mailbox of 1 GB)
- Cloud Exchange Comfort (= a Cloud Exchange mailbox of 25 GB)
- Cloud Exchange Maxi (= a Cloud Exchange mailbox of 25 GB + Archiving)
- Cloud Exchange Intense (= a Cloud Exchange mailbox of 25 GB + Archiving + Outlook license)
- Archive options: leave this field unchanged.
- Archive disk space limit: leave this field unchanged.
- Show this user in address book: checkmark this box to show the user in the contacts list.
- Automate calendar processing: select None.
- Delete attachments: leave this box unselected.
- Delete comments: leave this box unselected.
- Delete subject: leave this box unselected.
- Add organizer to subject: leave this box unselected.
- Click Finish.
The new user has now been created.