The model of the devices/accessories may differ from the illustrations. If you have received this product as part of an exchange or following installation by a technician, you will already have the Internet Box+ or the accessories required for it to work.
If you are replacing an Internet Box+,
Please ensure you always use the cables supplied by Proximus
.
Your Wi-Fi login details remain the same.
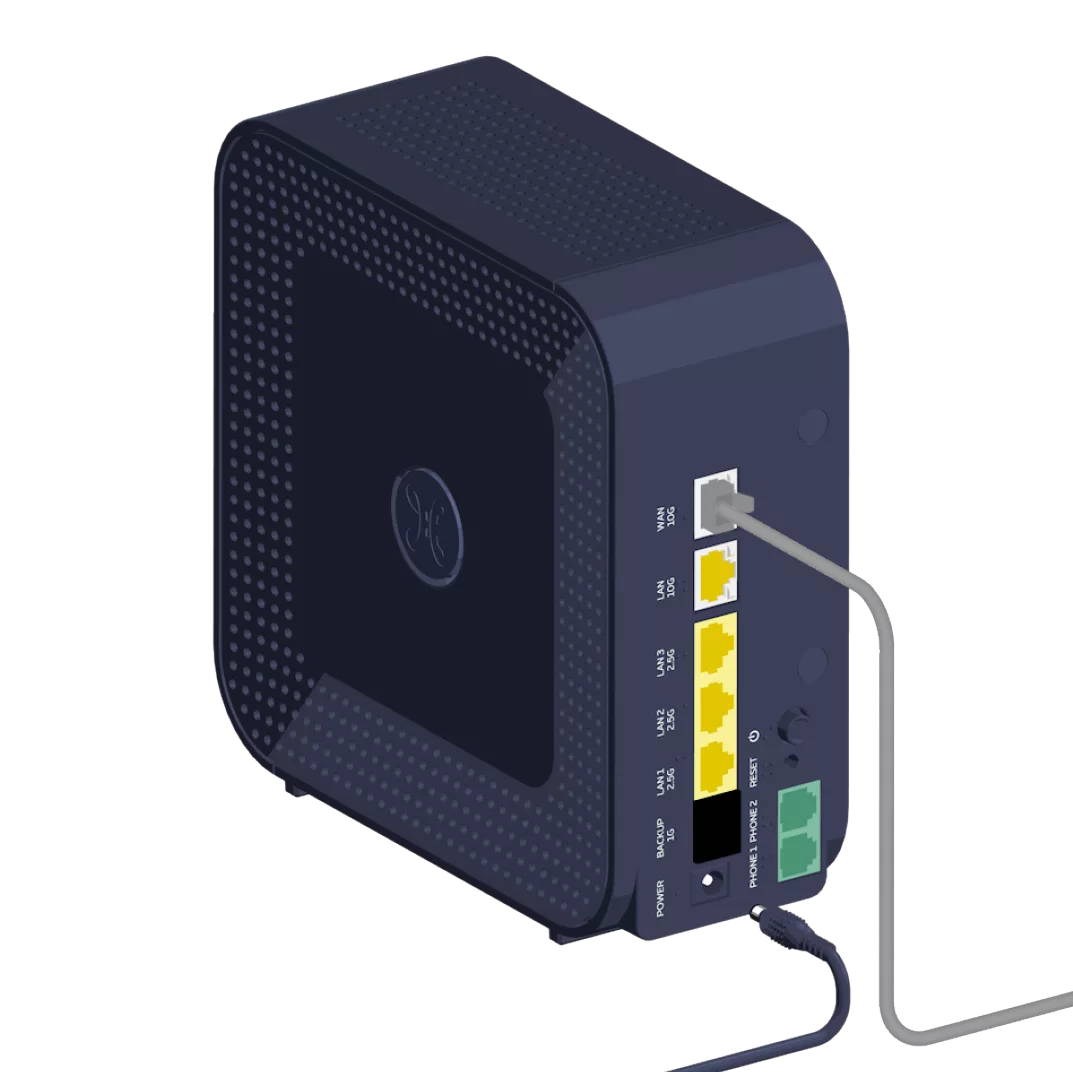
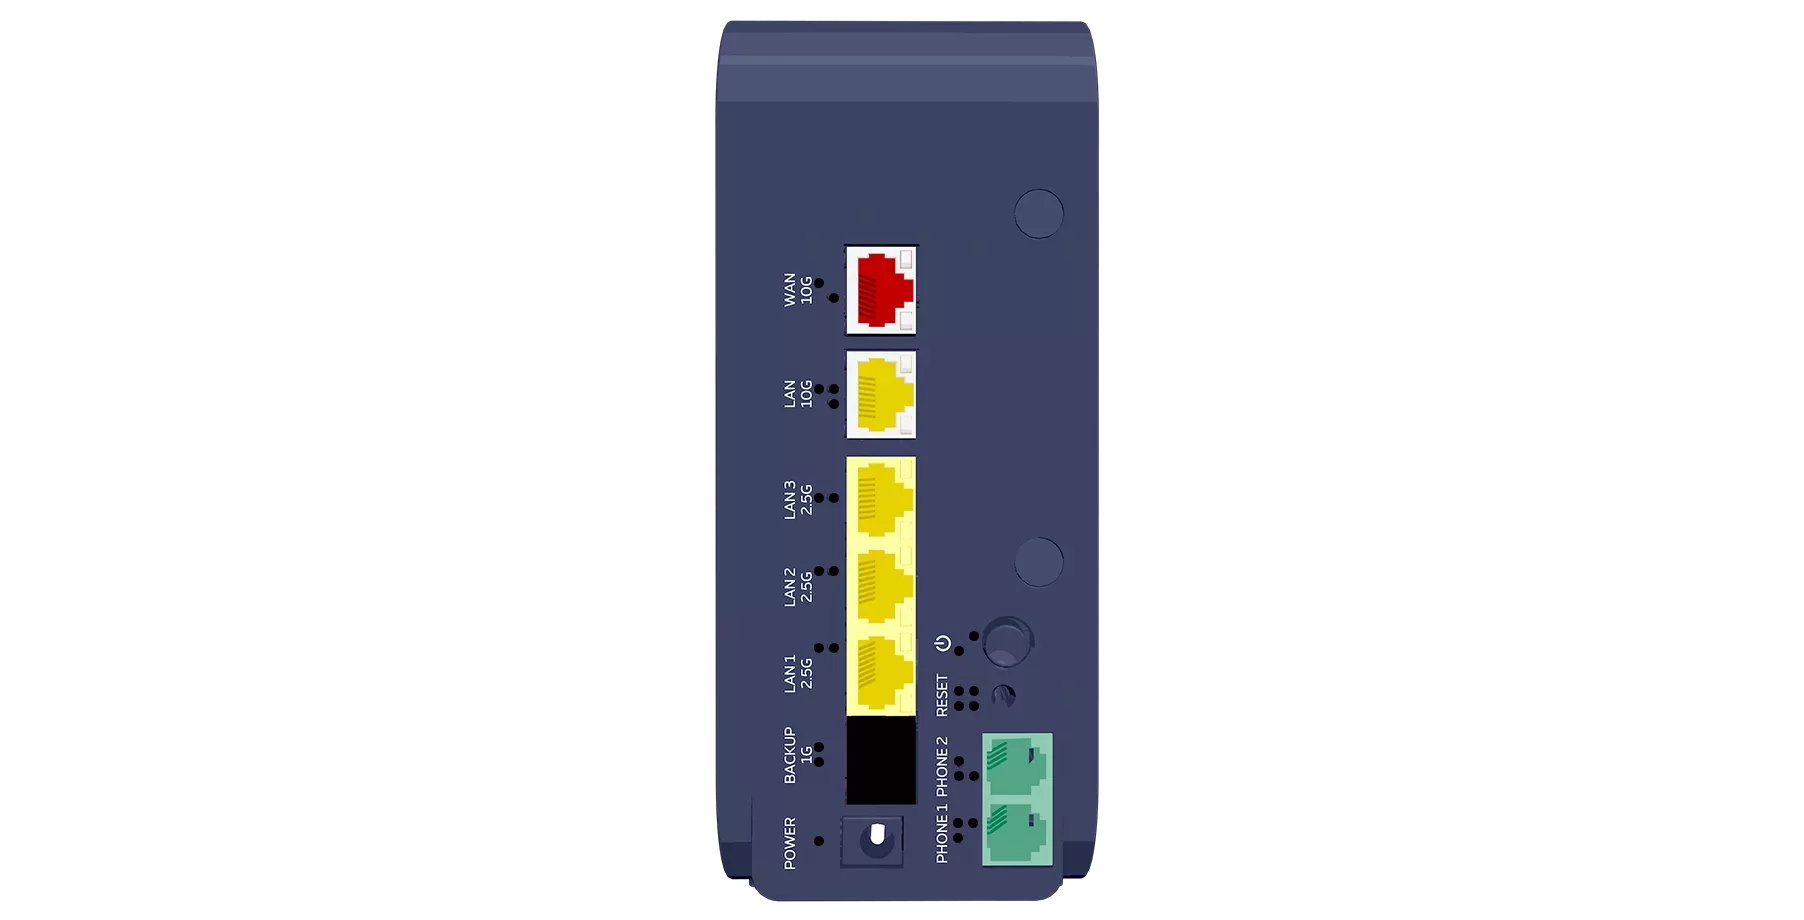
This guide is here to help you. Hold the device upright. Here is a description of the back of the device.
On the left, from bottom to top
The first port is for connecting the power supply cable.
The second red 1G BACKUP port is for connecting an Ethernet cable.
The third 1 2.5G yellow LAN port is for connecting an Ethernet cable.
The fourth 2.5G LAN port (yellow) is used to connect an Ethernet cable.
The 5th yellow 3 2.5G LAN port is used to connect an Ethernet cable.
The 6th yellow 10G LAN port (BRIDGE 4) is used to connect an Ethernet cable.
The 7th red 10G WAN port is for connecting an Ethernet cable.
On the right, from bottom to top
The first green PHONE 1 port is for connecting a cable.
The second green PHONE 2 port is for plugging in a cable.
The hole in the third position is used to reset the device.
The button in the fourth position is used to turn on and off the device.
Step 2
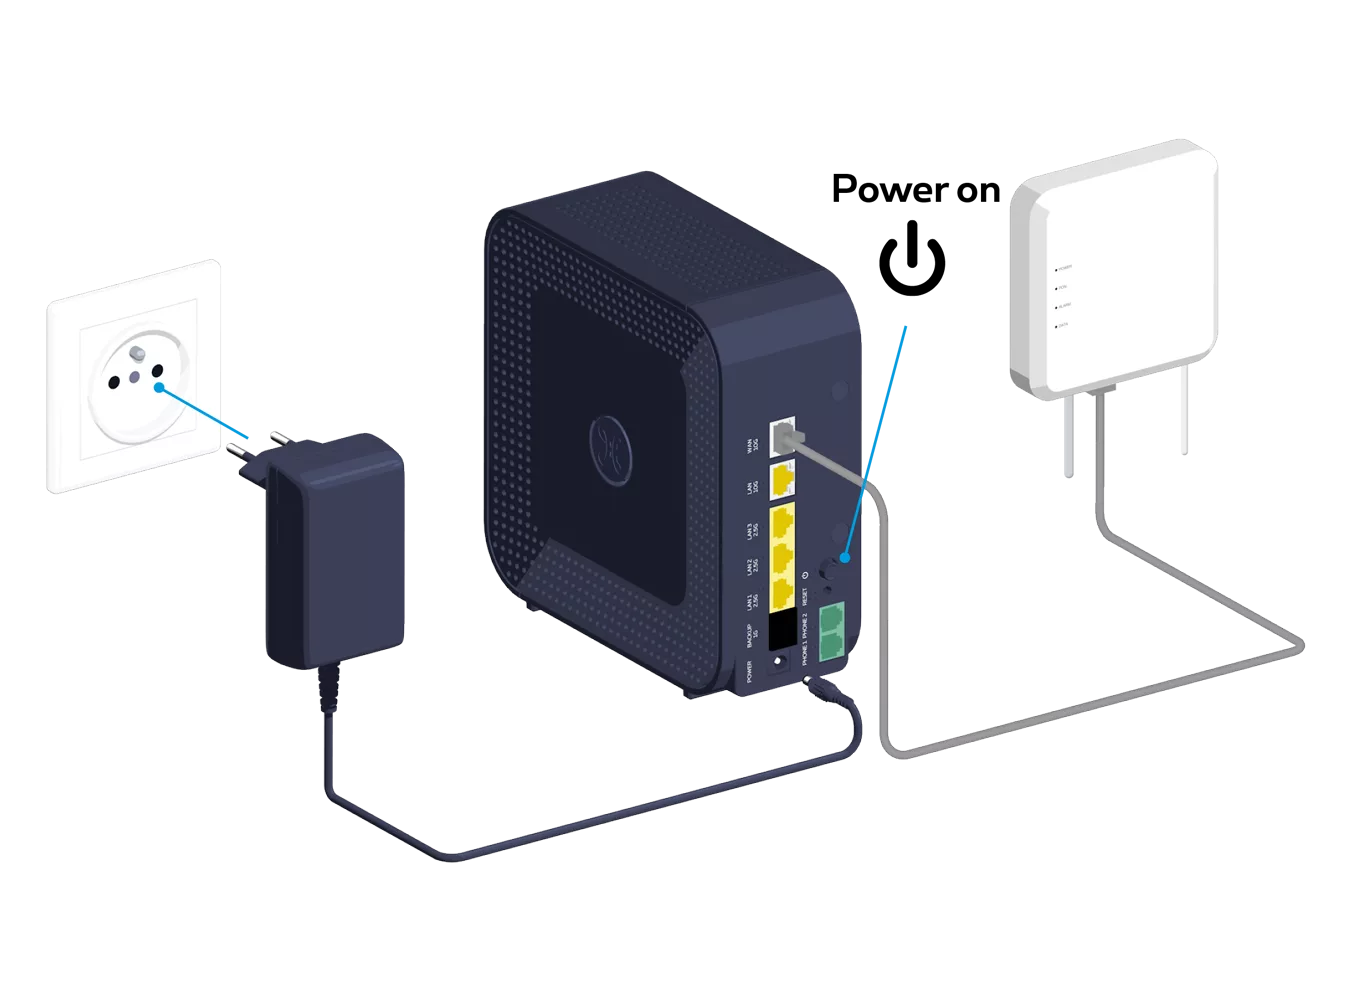
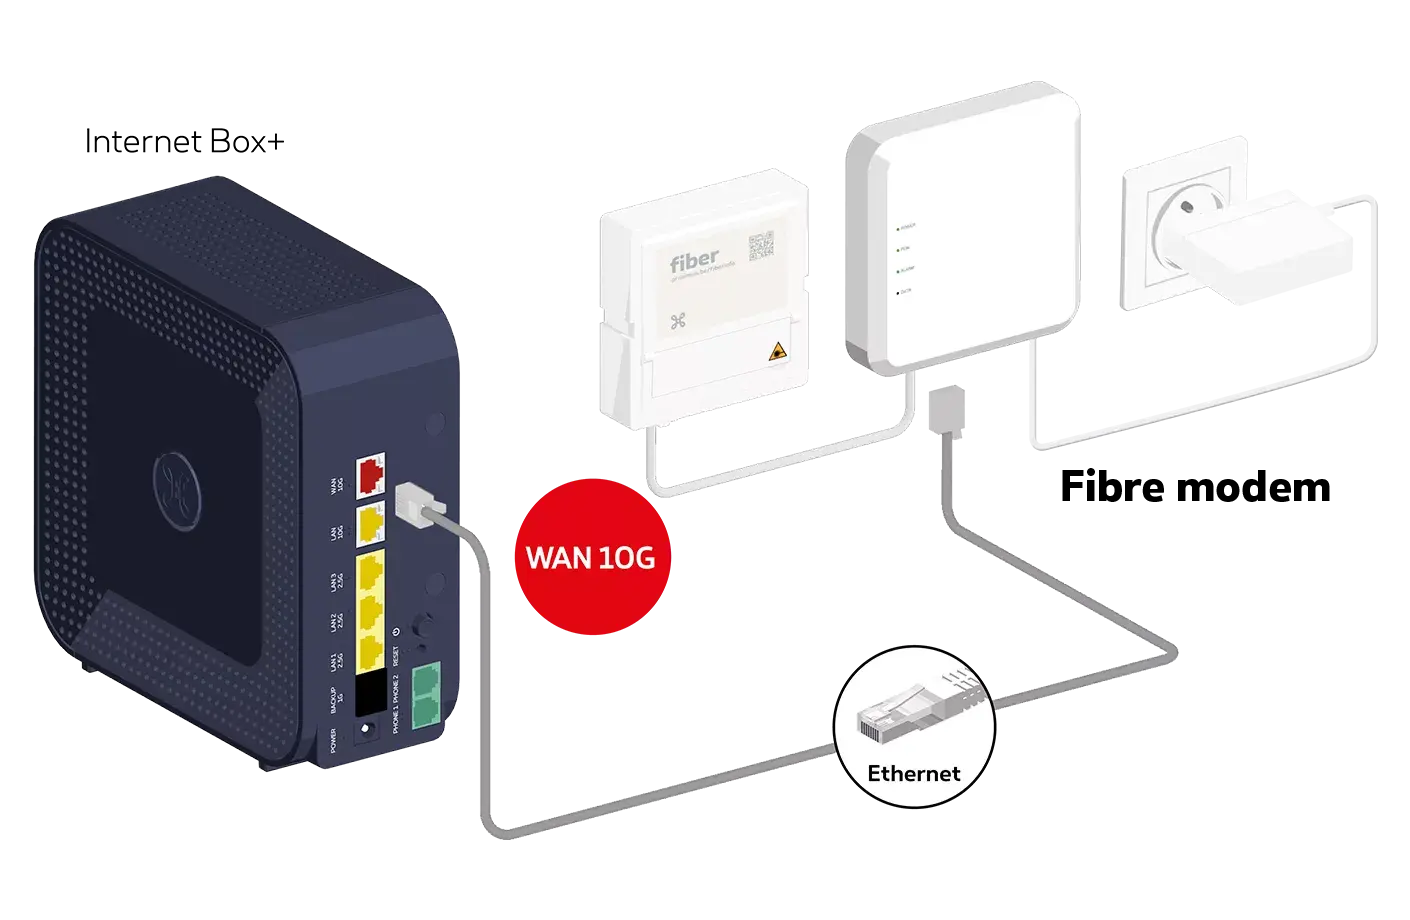
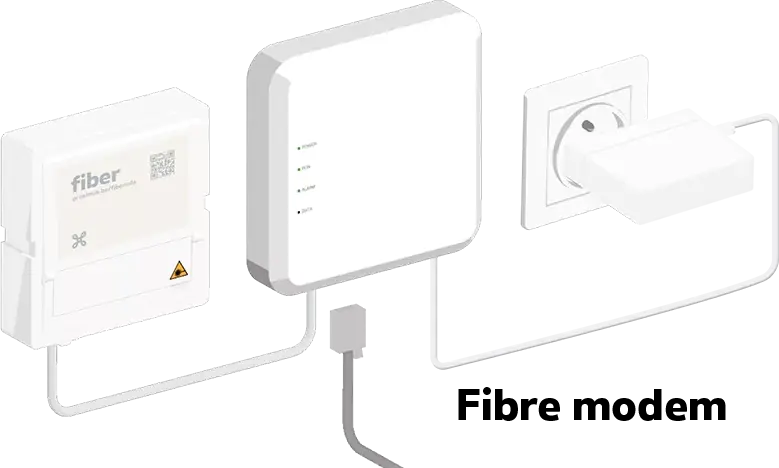
Connect the Internet Box+ to the Fiber modem
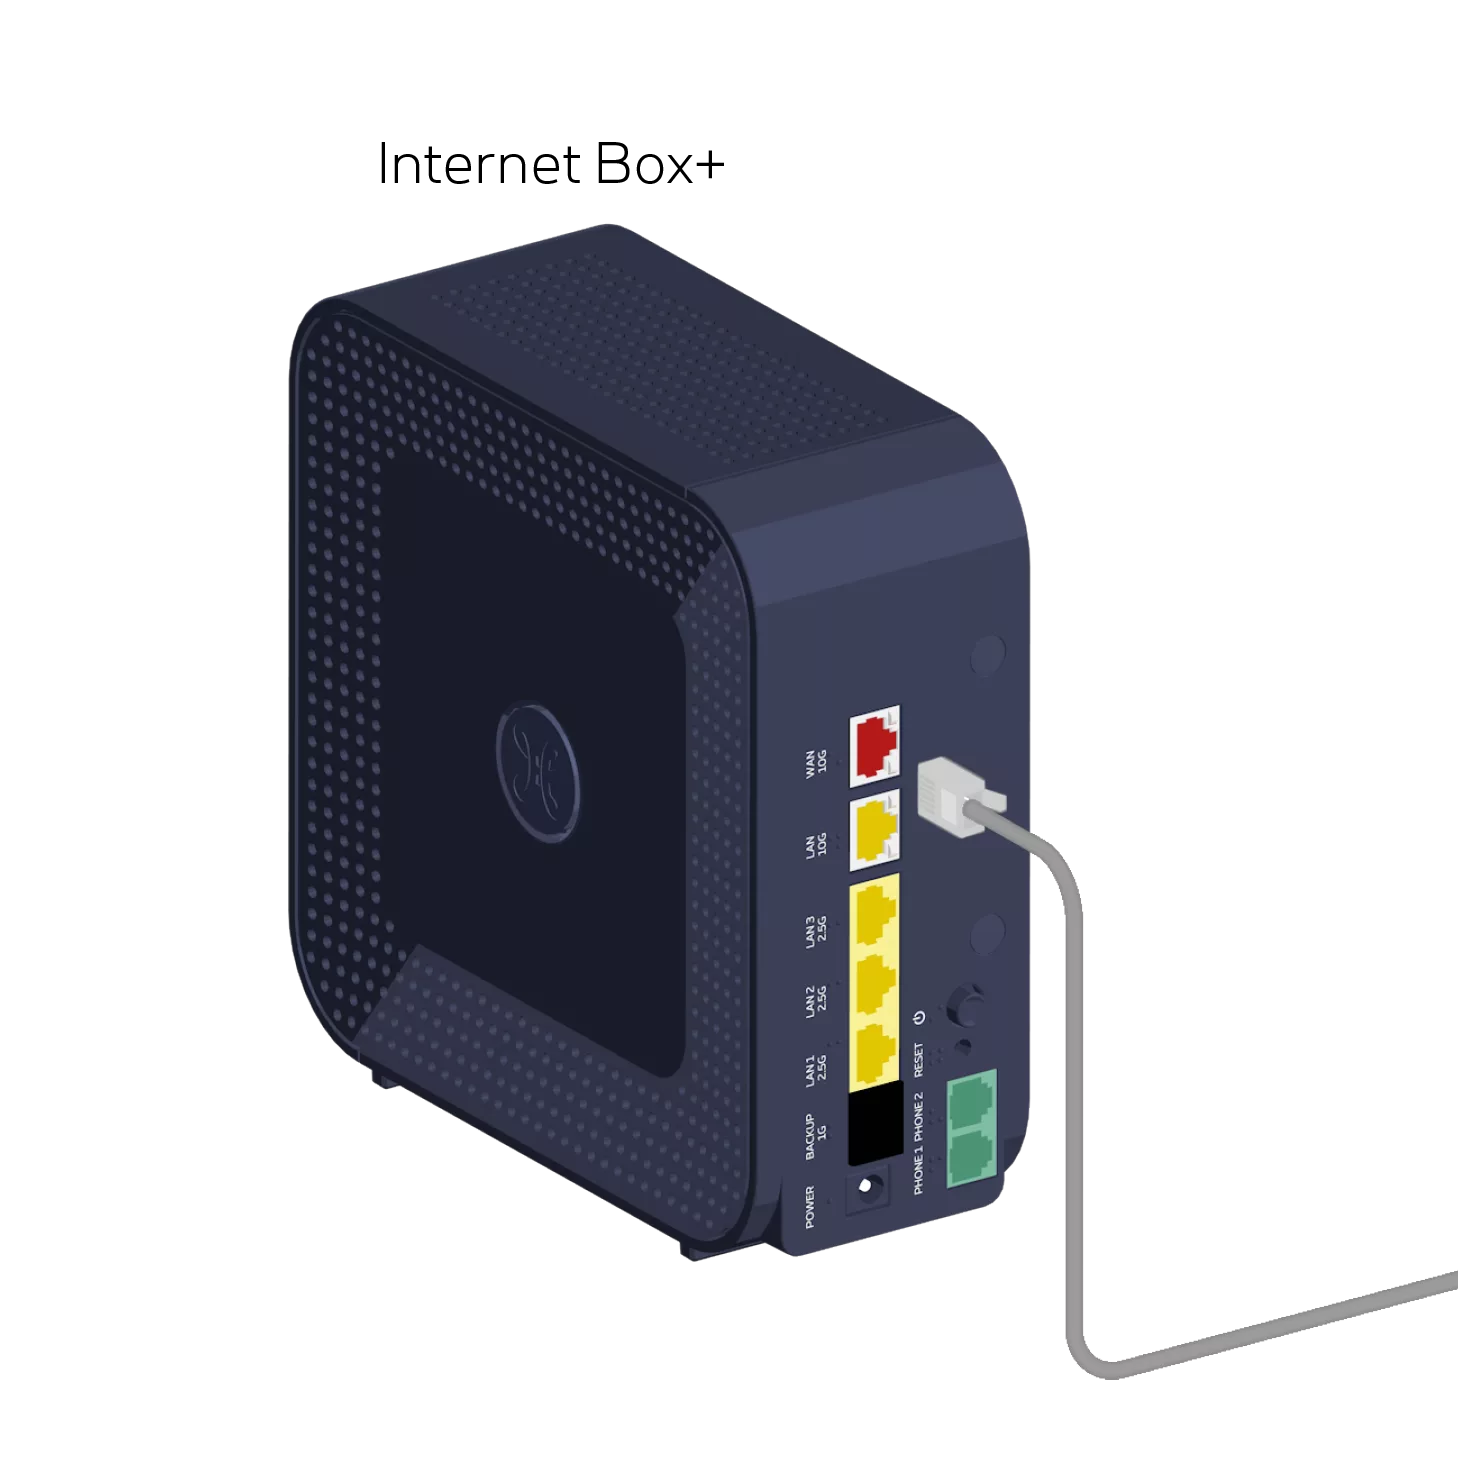
Ideally, use the grey Ethernet cable supplied with the Fiber modem. Alternatively, use the Ethernet cable with red connectors supplied with the Internet Box+ and connect it to the red WAN port 10G on the back of the Internet Box+.
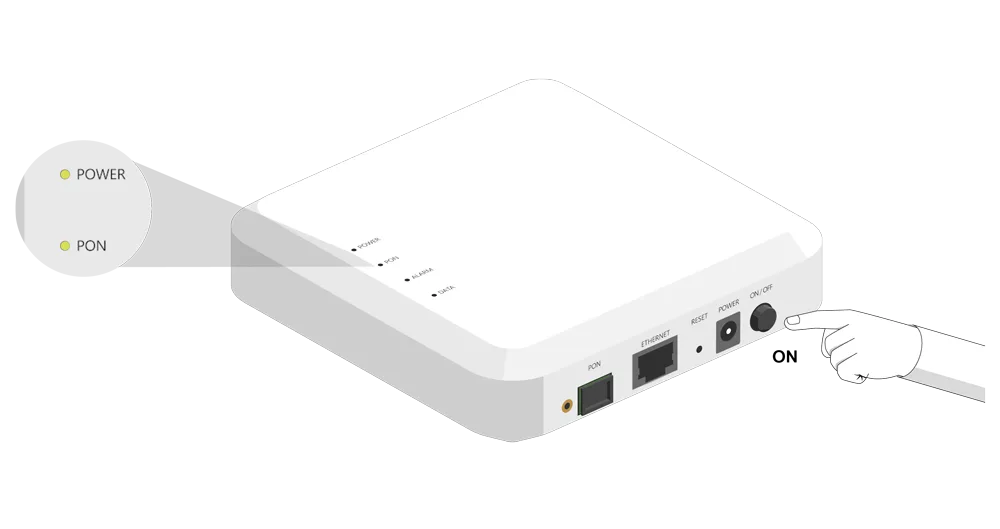
Check whether the Power and PON indicator lights are lit on the fiber modem. If they are not, press the ON button to turn them on.
This wall mount is available free of charge via our customer service on 0800 55 800.
Step 3
Switch on the Internet Box+
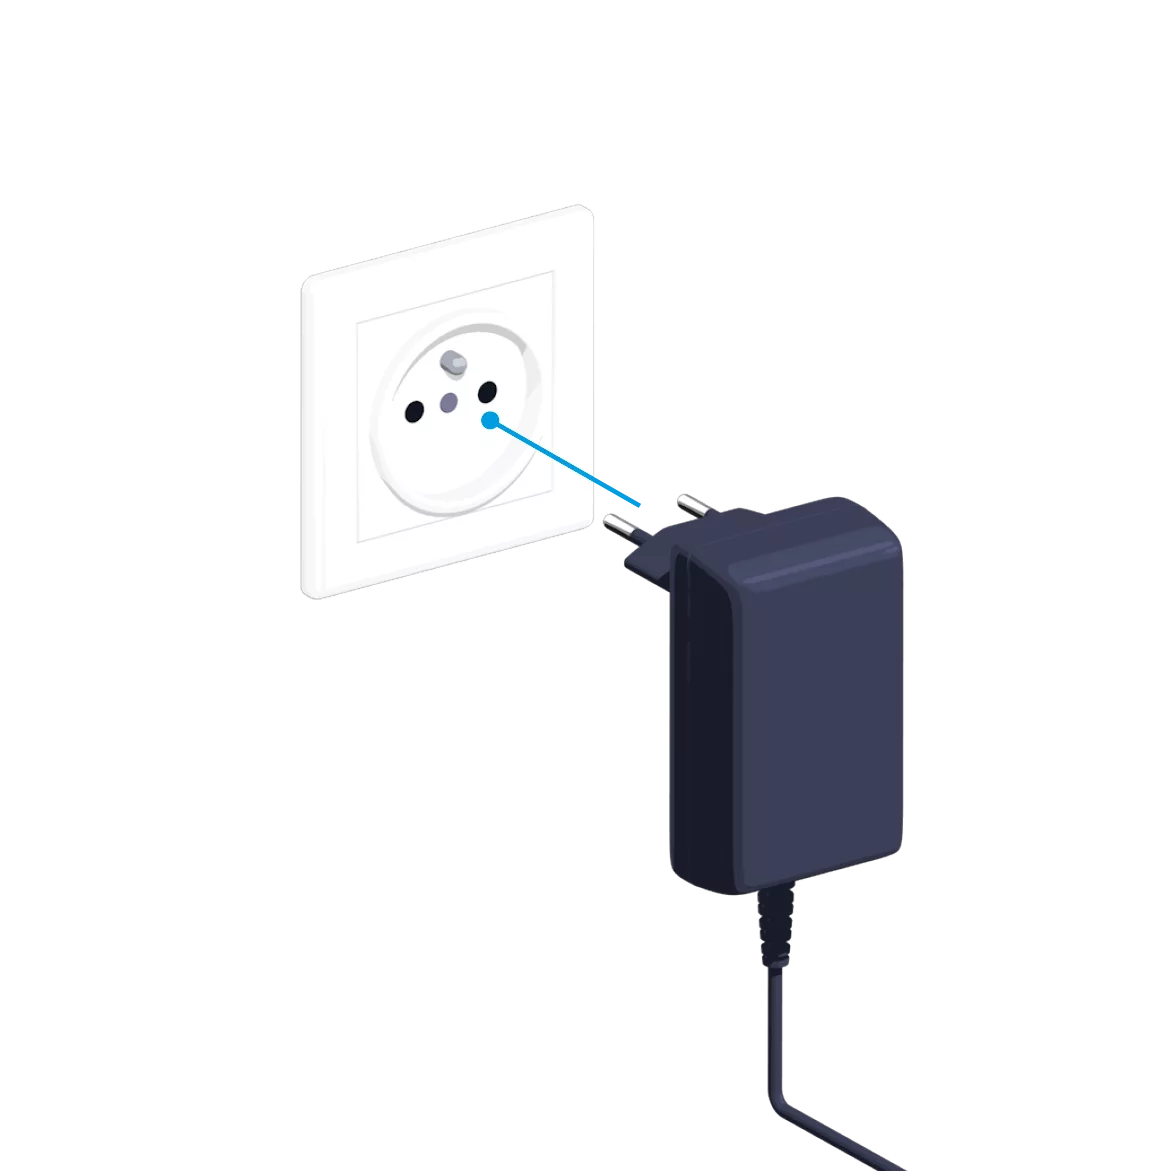
Connect the power cable to your Internet Box+ and to a power socket.
The switch is pressed in.
Step 4
Internet Box configuration and automatic updates for the Internet Box+
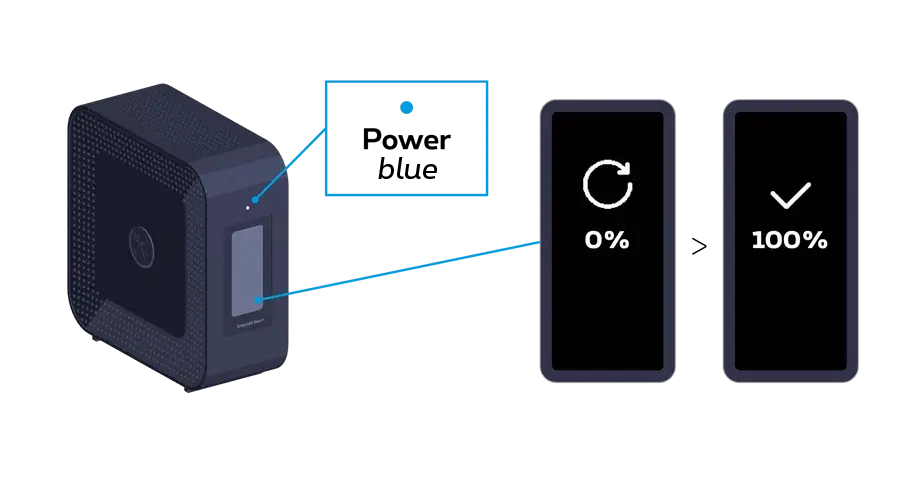
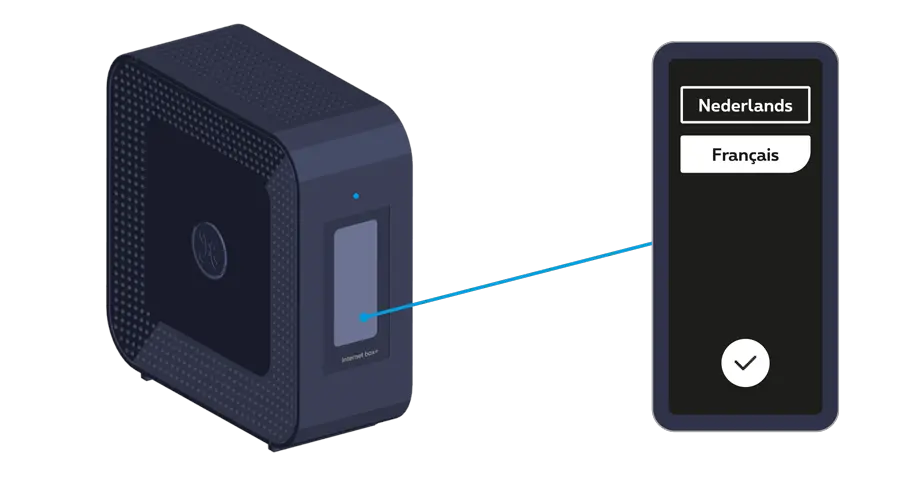
The start-up phase progresses from 0% to 100% over several minutes.
Once you’ve finished, select your language by tapping the screen.
Step 5
Connect to the Wi-Fi
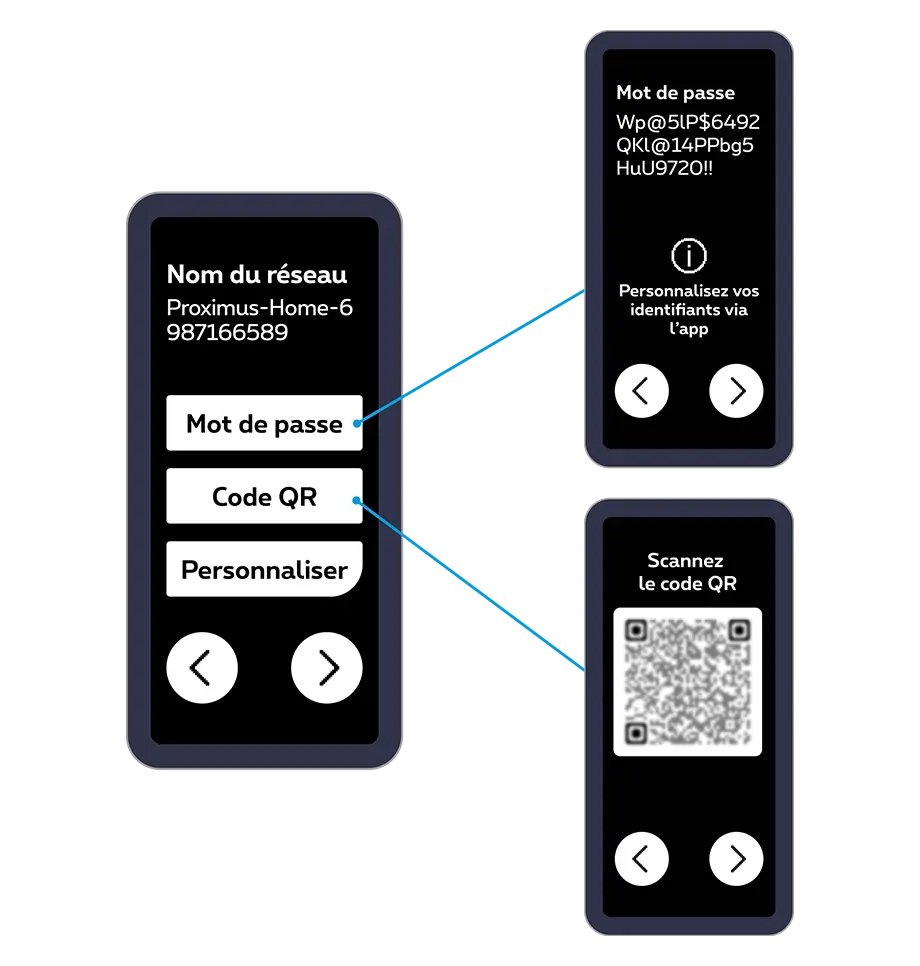
Select the network name on your PC, tablet or smartphone and enter your password. Even easier: scan the QR code generated by the device using your tablet or smartphone.
You can share and customise your Wi-Fi access codes via the Proximus+ app, under ‘Internet’.
Step 6
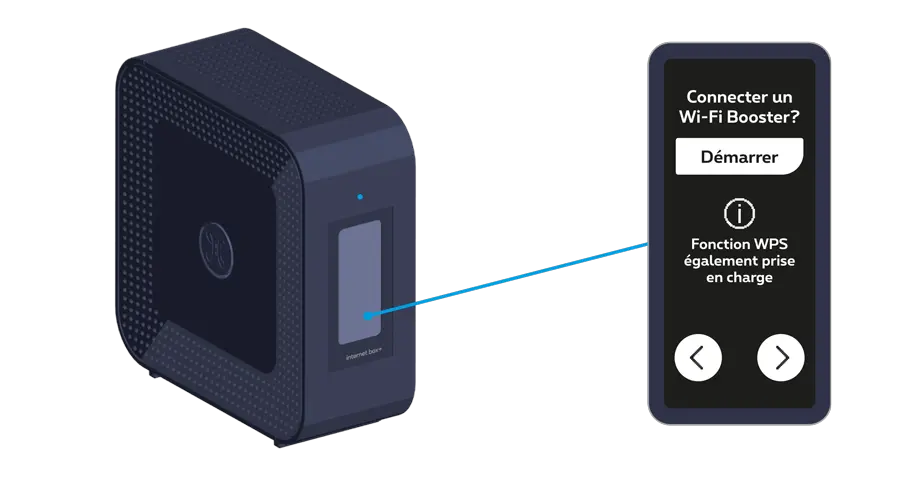
Connect a Wi-Fi Booster+ 7 (optional) or any other device with WPS functionality
You can connect a Wi-Fi Booster+. If you would like to do so now, press “Démarrer” and follow the Wi-Fi Booster+ 7 Installation Guide starting from step 3B. Otherwise, press the right arrow.
Step 7
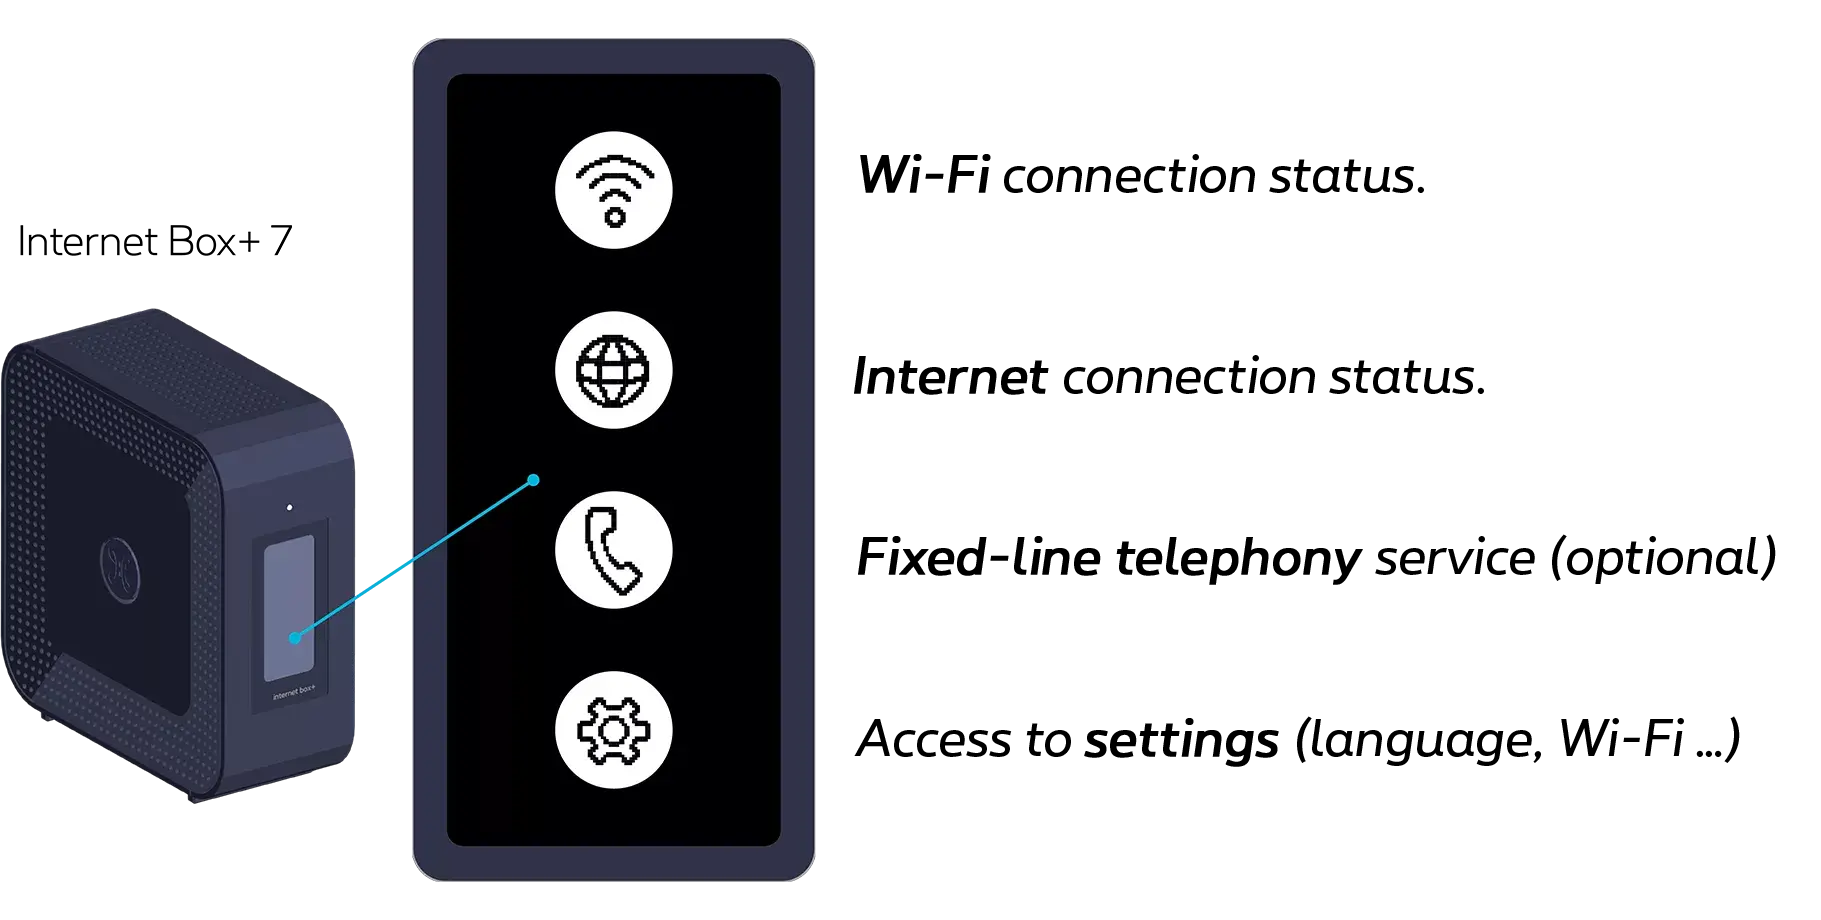
Once the configuration is complete, these icons will appear on the screen
 On the left, from bottom to top
 The first port is for connecting the power supply cable.
 The second red 1G BACKUP port is for connecting an Ethernet cable.
 The third 1 2.5G yellow LAN port is for connecting an Ethernet cable.
 The 6th yellow 10G LAN port (BRIDGE 4) is used to connect an Ethernet cable.
 The 7th red 10G WAN port is for connecting an Ethernet cable.On the right, from bottom to top
 The first green PHONE 1 port is for connecting a cable.
 The second green PHONE 2 port is for plugging in a cable.
 The hole in the third position is used to reset the device.
 The button in the fourth position is used to turn on and off the device.
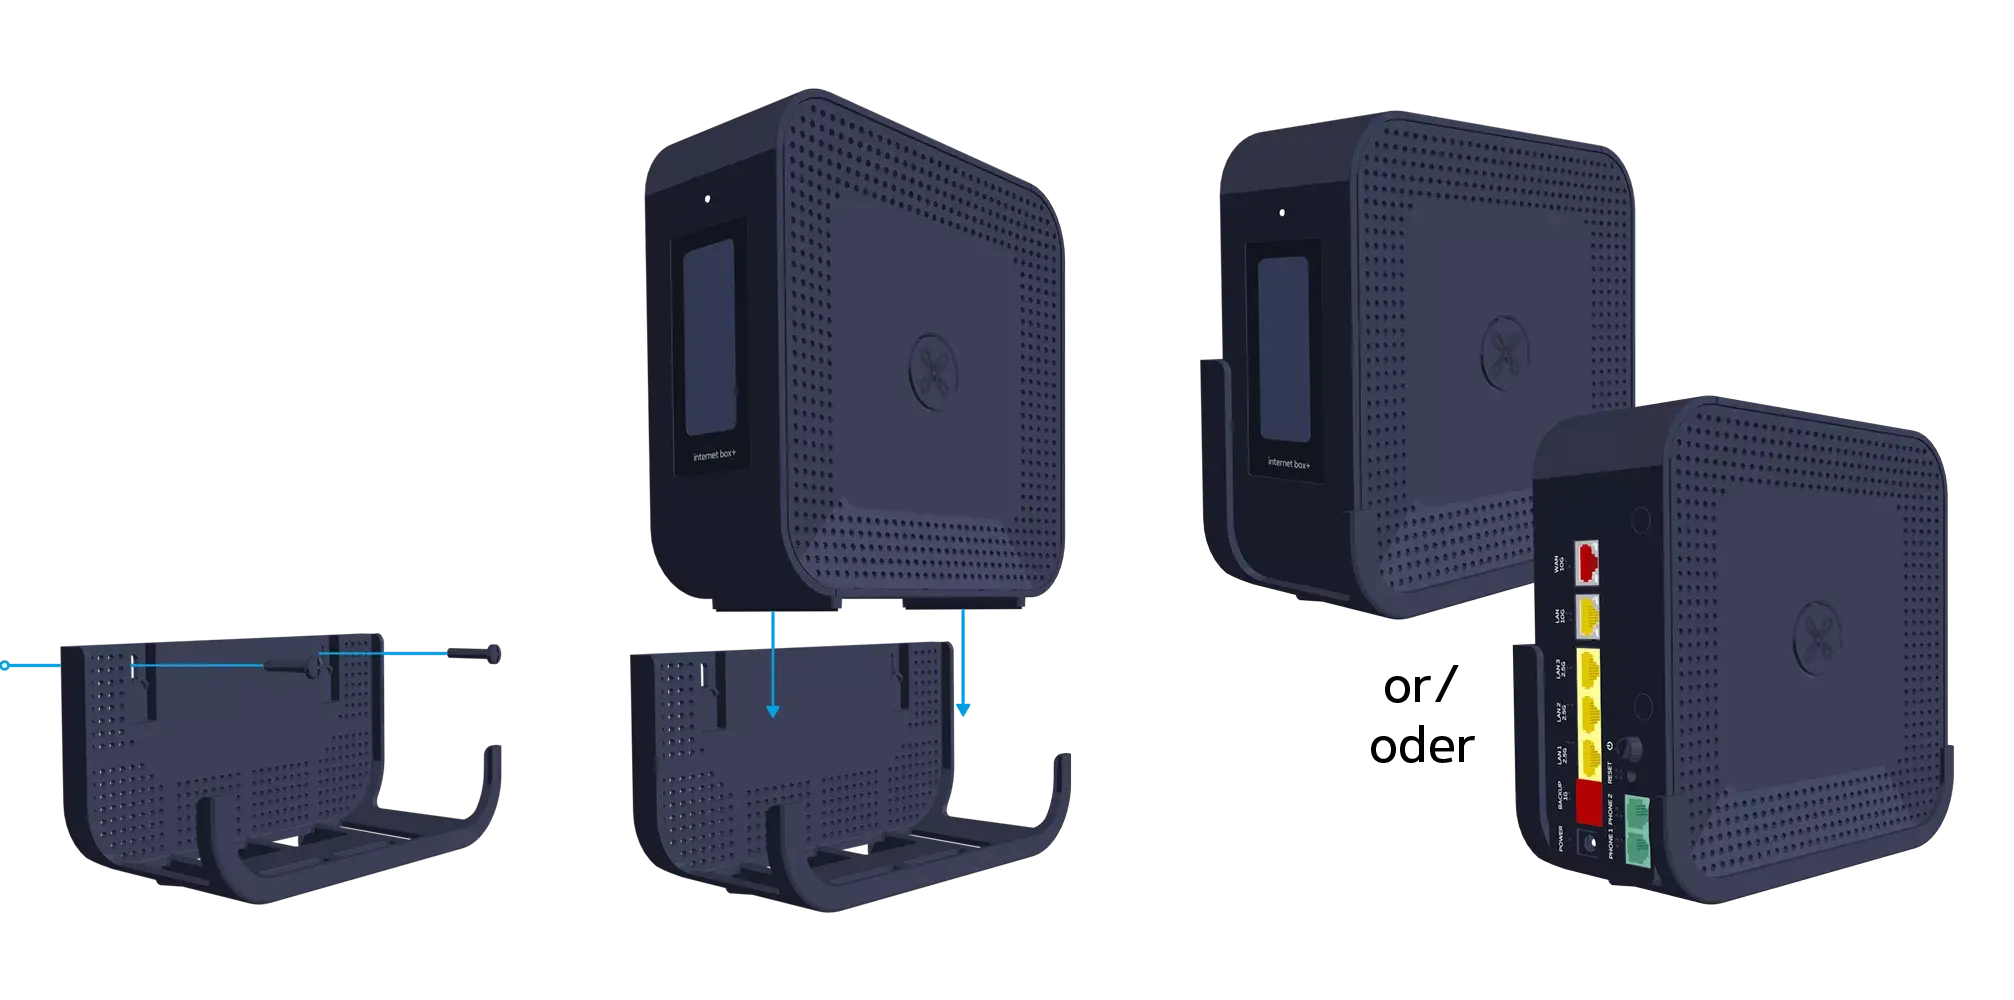 This wall mount is available free of charge via our customer service on 0800 55 800.