Manage licenses in Office 365

Each Office 365 user needs a license. Depending on your Office 365 account, you have one or more licenses available. Not enough or too many licenses in your account? You can purchase or return them anytime you want.

Viewing your licenses

  1. Log in to Office 365, click on the Blue dots menu menu and select Administrator.
  2. Select Billing in the menu on the left and then Licenses.
    Click on Billing and then Licenses.
  3. In the columns you will see how many licenses you have and whether they have been assigned.
    Available licenses in Office 365

In the example above, you can still assign 8 licenses to new users.

Managing your licenses

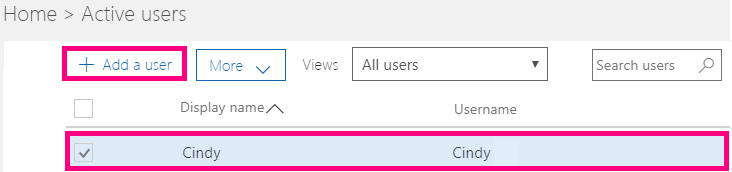
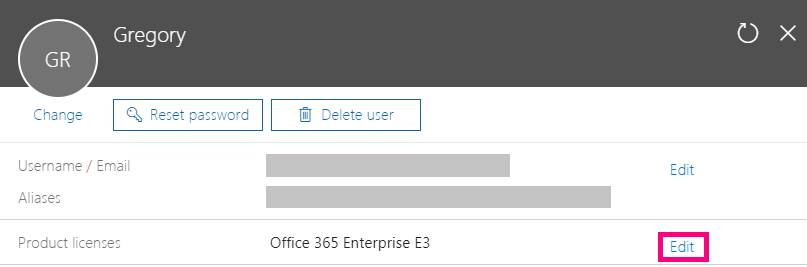
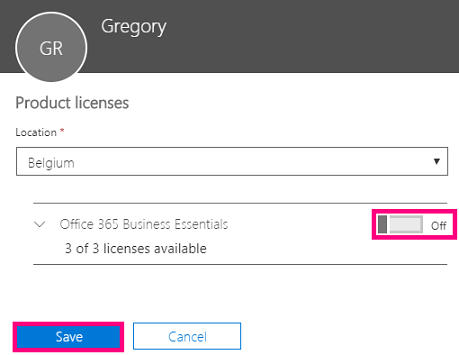
Removing a license? First, unassign it from the user and avoid losing his or her files.

  1. Send an e-mail to webservices@proximus.com: provide your Office 365 username and the number of licenses you want to add or remove.
  2. Once your licenses have been adapted you will receive confirmation by e-mail.

You can now log in to Office 365 again to view the number of available licenses.

  1. Log in to Office 365, click on the Blue dots menu menu and select Administrator.
  2. Choose Users > Active Users.
    Click on Active users in the Users menu.
  3. Add a new user or select an existing user.
    Click on Add a user or click on the username of the user.
  4. Choose Edit next to Product licenses.
    Click on Edit next to Product licenses.
  5. Move the slider to 'On' or 'Off' next to the license you would like to assign to the user and click Save.
    Move the slider to 'On' next to the license you would like to use.

The license will be unassigned or removed. The user can now either log in to Office 365 or has lost his or her access.