Name mobile users in MyProximus Enterprise
To easily manage your company's mobile numbers, you can link mobile numbers to the right user and assign personal references to them. That way you don't have to know all your numbers by heart. You can name users individually or in bulk.
Name a user
To name an individual user or add a personal reference, follow these steps:
- Log in to MyProximus Enterprise. Don't have an account yet? Register as a Digital Access Owner or Delegate User.
Log in to MyProximus Opens a new window - Click on Products and Mobile number management. You will get an overview of all your mobile numbers.
- Type the mobile number you want to name in the search field and click on the symbol. Then click on the mobile number that appears at the bottom.
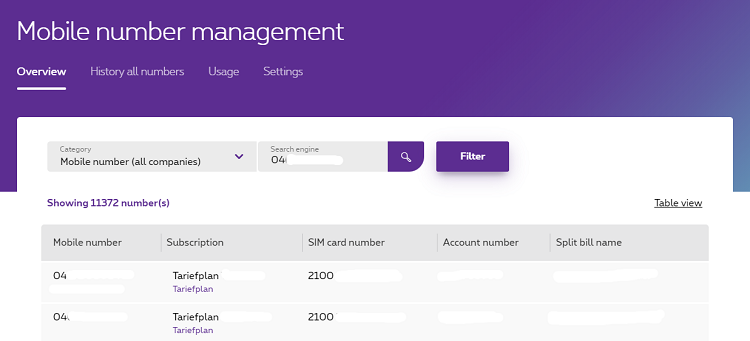
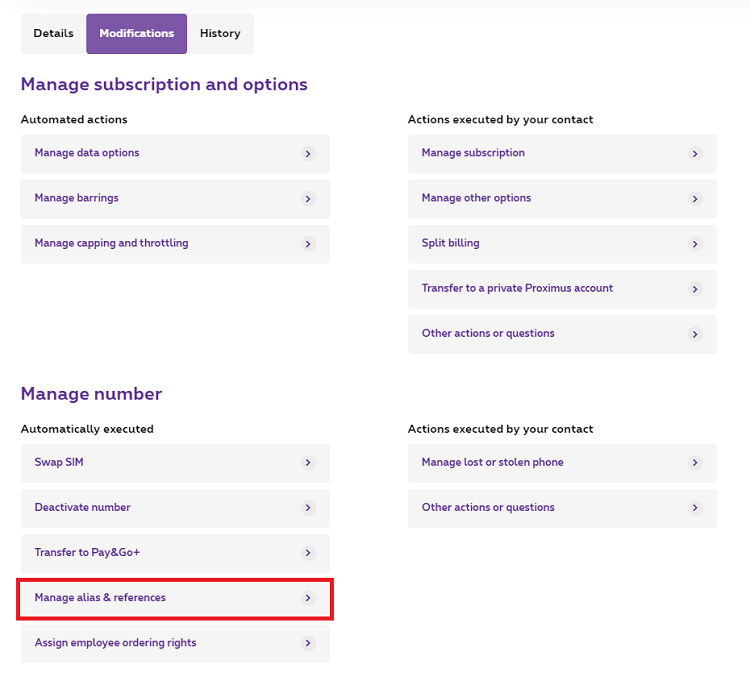
You can also change the number in the Mobile number drop-down menu by Alias name, Reference 1 or Reference 2 to search for a name or reference you have previously entered. - You will now arrive in the overview for this mobile number. In the Modifications tab, click on Manage alias & references.
- Enter the name (alias) of the user and any references and click on Update.
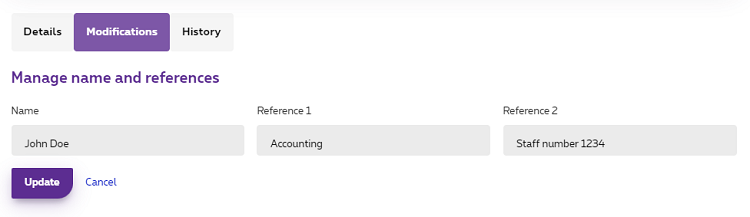
The name (alias) of the user will now be shown in the overview for this mobile number and all your mobile numbers. To also display the references in the overview of all your mobile numbers, click on Table view at the top right and then check References.
Name multiple users
To name users in bulk or to add personal references, follow these steps:
- Log in to MyProximus Enterprise. Don't have an account yet? Register as a Digital Access Owner or Delegate User.
Log in to MyProximus Opens a new window - Click on Products and Mobile number management. You will get an overview of your mobile numbers.
- Scroll down and under the overview of your mobile numbers click on Modify multiple numbers.

- Now click on Manage alias name & references.
- Click on Download template to download the Excel file. You can now fill in the following fields:
- Mobile Number: enter all mobile numbers you want to name here.
- Name: enter the name of the user here.
- Reference 1: enter here a first personal reference (optional), e.g. a cost center, department, personnel number, etc.
- Reference 2: enter here a second personal reference (optional), e.g. a cost center, department, personnel number, etc.
- Upload the file after you have saved it and click Update.
The names (aliases) of the users will now be shown in the overview for their mobile number and all your mobile numbers. To also display the references in the overview of all your mobile numbers, click on Table view at the top right and then check References.
Names (aliases) and references are also exported when you click Export to Excel.